Blog
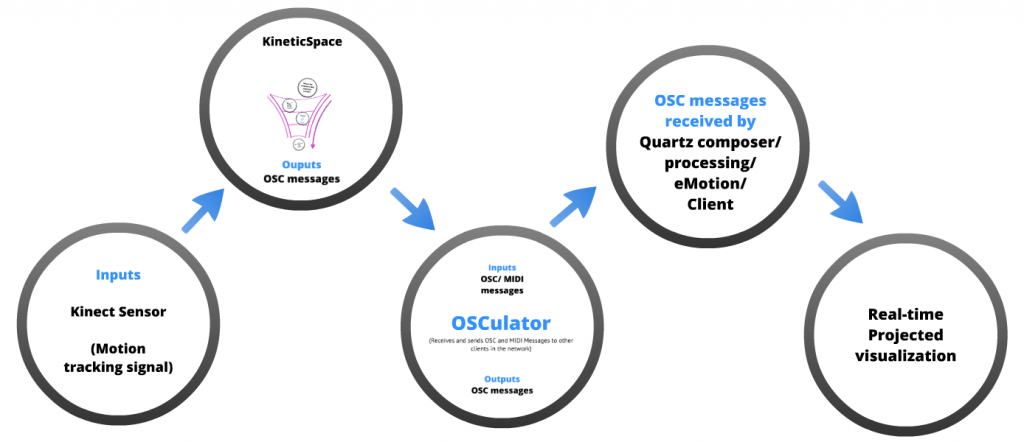
Design process: Defining the workflow – Motion tracking output Detail
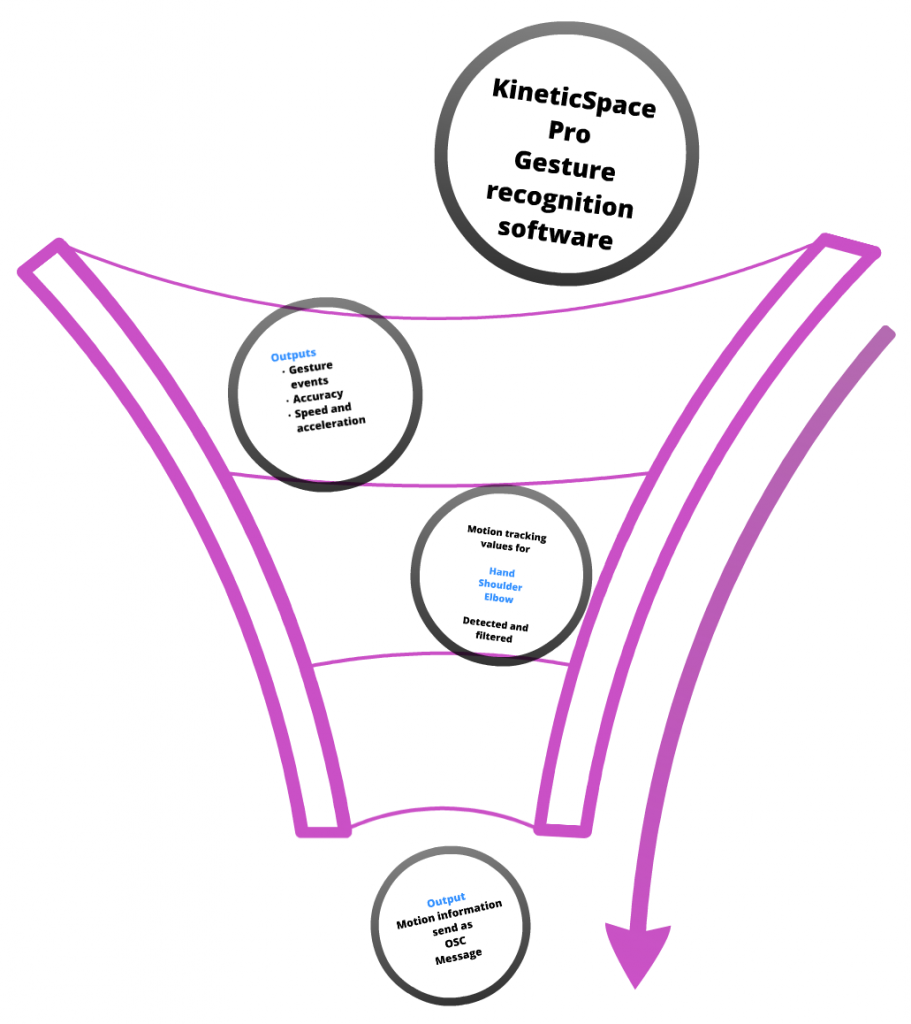
Logical setup for Skeleton tracker values into OSC messages.
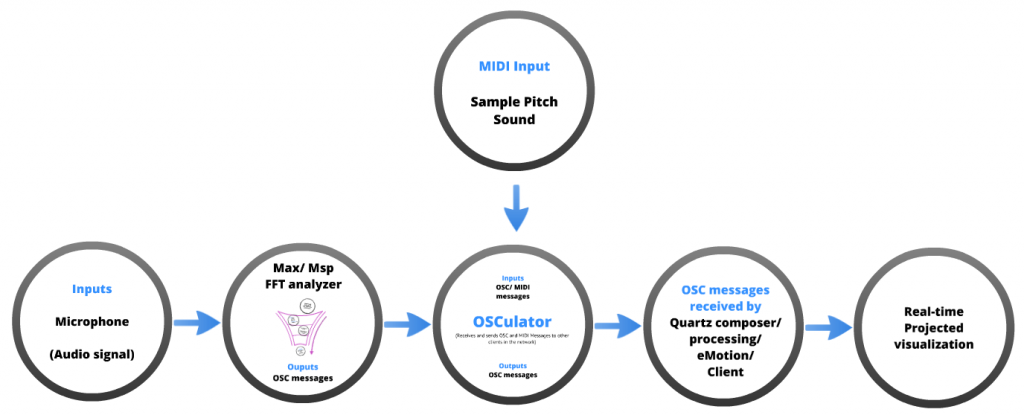
Design process: Defining the workflow – Sound analysis output detail
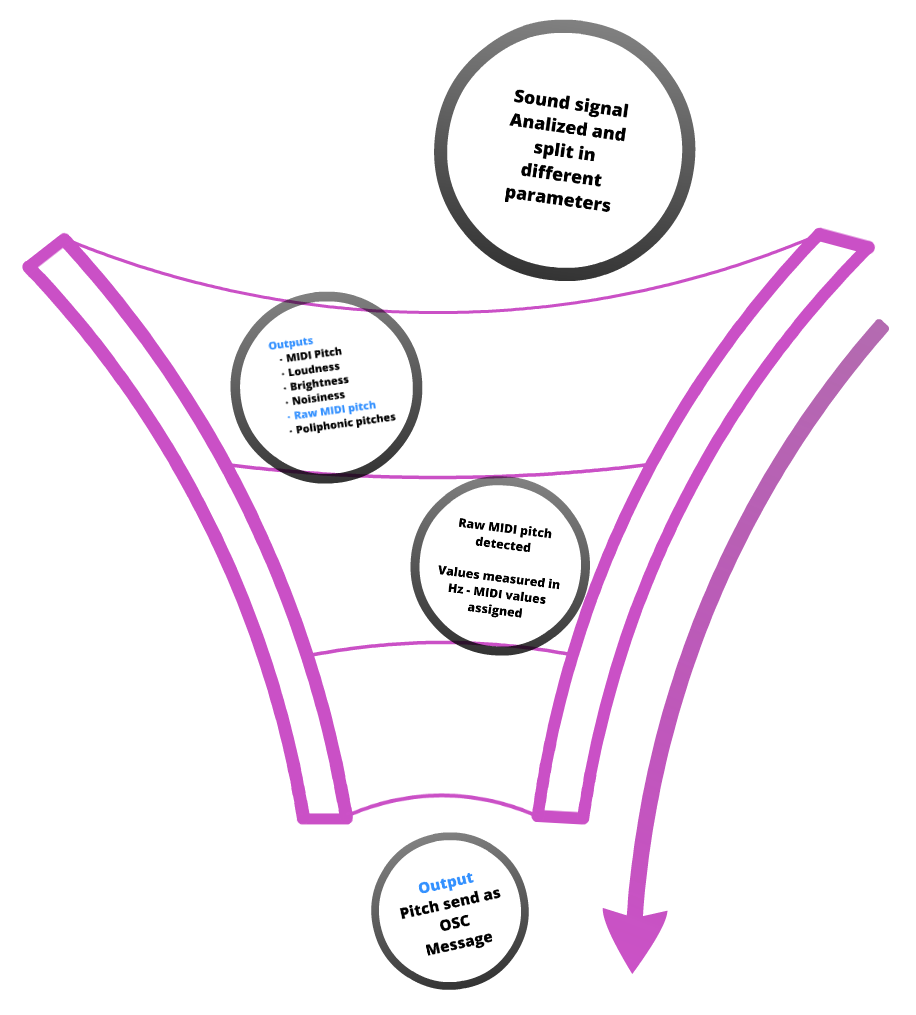
Logical setup for pitch detection trhough FFT extractors into OSC messages.
Design process: Physical Setup
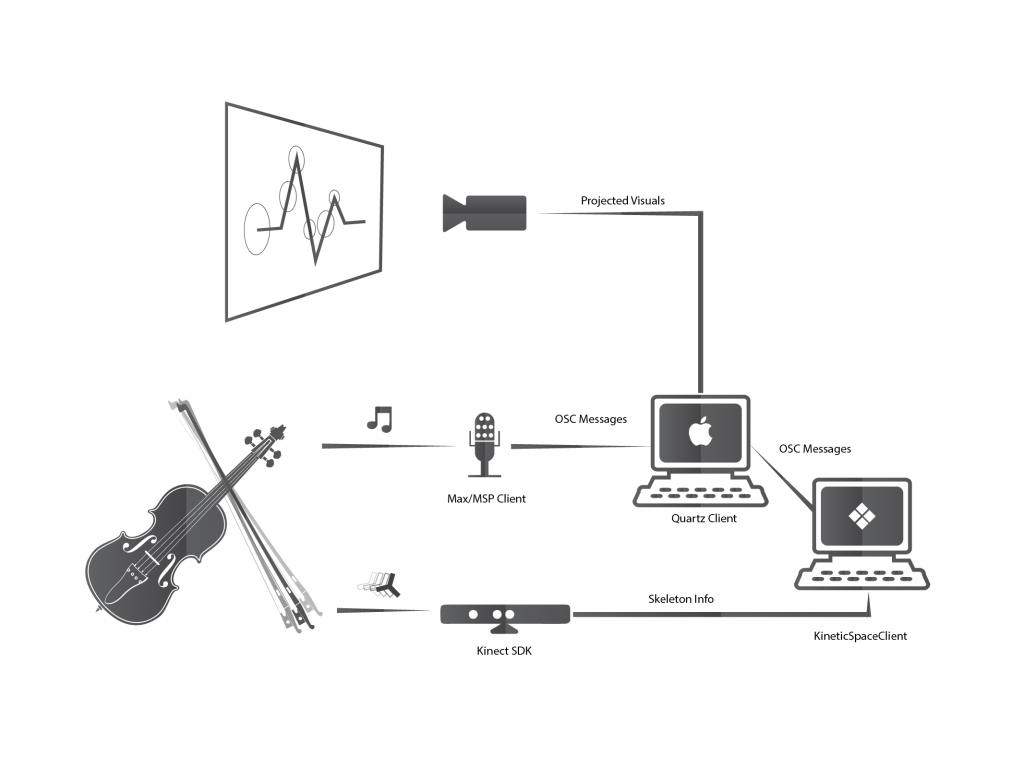
Physical setup for both Excercises based on proposed hardware and software
Design process: Network setup
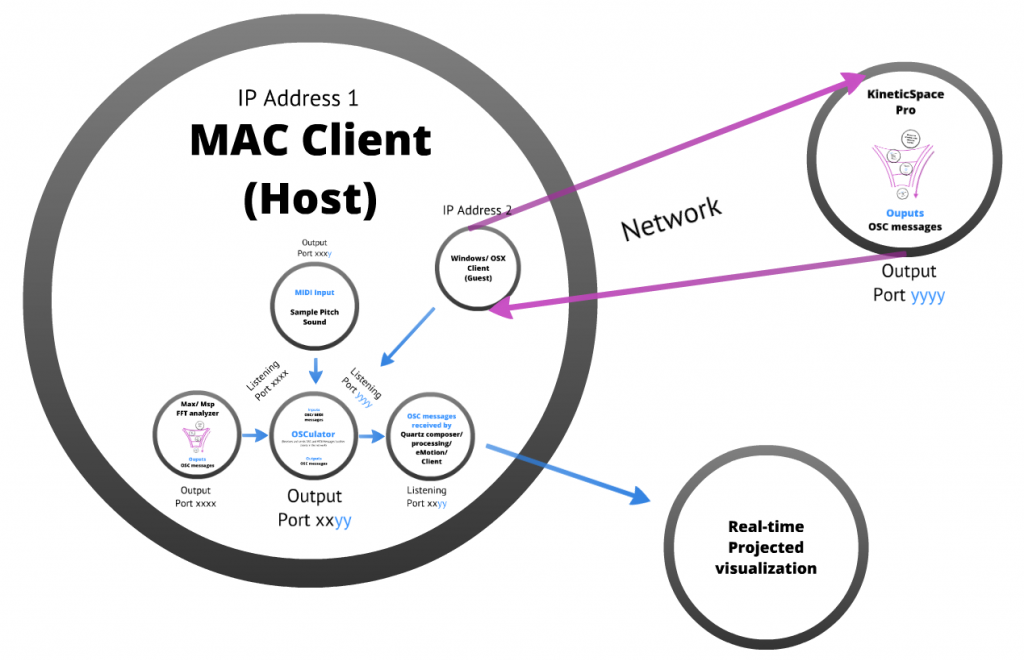
Network setup for both Exercises based on proposed hardware and software.
The proposed method in the classroom
How can it be used in the class?
The interface is part of the lesson plan of the teacher. It replaces the traditional blackboard. Explanations and traditional methods to use can be displayed simultaneously by the movement of the arc on the visual interface. The student can then internalize the process of trying and additionally get help and feedback from the teacher.
Process, Visualization and Listening: The student, during the hearing and by the visual impression try to imitate the motion (without bow).
Exercise: You can practice the movement alone or along with music. In the proposed interface, there will be vertical lines which would indicate the pulse.
Results: the student can record and watch and listen to what he has done.
- This process can be repeated as often as necessary until the student is satisfied with the result.
- The recordings can be sent to teachers in the weeks and this can give his feedback to the student (Eg. Good, Warning you are not playing in tempo)
After all exercises to get ratings, which function according to cumulative way. At the end of the level achieved is represented by a color.
There are so use the Violin Painting the possibility of online exchanges between students. Is recommended for students in the same school, the same teacher, or for those who live in a city because the motivation can be enhanced through the competition.
Next steps
The method is already developed. Now its clear how its going to be used in the classroom as well as in the daily practice. Now its necessary to organized all the music material we need. Which music are we going to use? How is the best way to put all the information we want to work with in a short musical piece?
We need to make a recording in the next days and then assemble it to the interface.
Fifth session: Drawing prototype testing+fine tuning
Based on previous observation and tests, now the visualisation still needs more tuning, but is working with some changes such as:
- Frame of reference for movement detection: xyz coordinate system from the Kinect skeleton tracker.
- An anchor point for joint position and speed measuring was defined so it it doesn’t matter how tall or how small, it will work according to the player body lengths.
- The Y coordinates for the particles in the Visual sketch are defined by the speed and position changes in the Y and Z axis of the Kinect coordinate system.
- The X coordinates are defined by the speed on the X axis on the Kinect coordinate system.
- Currently some variables are defined randomly but some of the will be controlled by other inputs from the sound feature extractor, like Color and size could be controlled by Pitch and length of musical note. This variables are currently being read by the Quartz sketch but not properly integrated.
- Rewards could be also represented by a particle trace that could get activated while performing the piece correctly.
Due to lack of space on Vimeo, click on the following links to look at the videos:
Fourth Session: Drawing prototype testing
During the latest sessions we had, we aimed to fine tune the Visual response to the violinist’s bow strokes so they could be better represented on the interface.
Basically this prototype has 3 lines which represent the original sample (green) which should be followed by the other 2 (purple) which try to catch up with the sample, so you can can have kind of a “Karaoke” interaction; although properly defining the user experience, interface design and player interaction is the next step.
We faced different challenges:
1. Define coordinate system: Find out how should we work with the coordinate system. (We are visualising in 2d while we are tracking 3d movements).
2. Do the math: make linear transformations for every value you want to work with.
3. Define the origin and reference of the system: One size fits all! It should work either the player is short or tall, e.g.
4. What’s best, to work with position information, or speed change information? actually, both, but apparently speed changes work best to easily draw and fine tune the particles and their changes in direction and speed.
5. Are we doing an adequate translation of the bow strokes into the interface? We’re getting there we think! we want to properly achieve a proper sense of the metaphore between a bow stroke and a brush stroke.


Recent Comments